How to Drill Acrylic Sheet With Less Risk of Cracking It
Drill acrylic with a bit ground for plastics, at a low speed and with light pressure, with the sheet clamped to a scrap backer board. Ease off as the bit breaks through. Most cracked holes come from a standard twist bit grabbing the sheet as it exits.
Acrylic and plexiglass are the same material, so everything here applies to both.
Why does acrylic crack when you drill it?
The bit grabs. A standard twist bit has a sharp, aggressive cutting edge made to bite into metal and wood. In acrylic it digs in and pulls itself forward. The worst moment is breakthrough: the bit lunges through the last of the material, wedges in the hole, and splits the sheet.
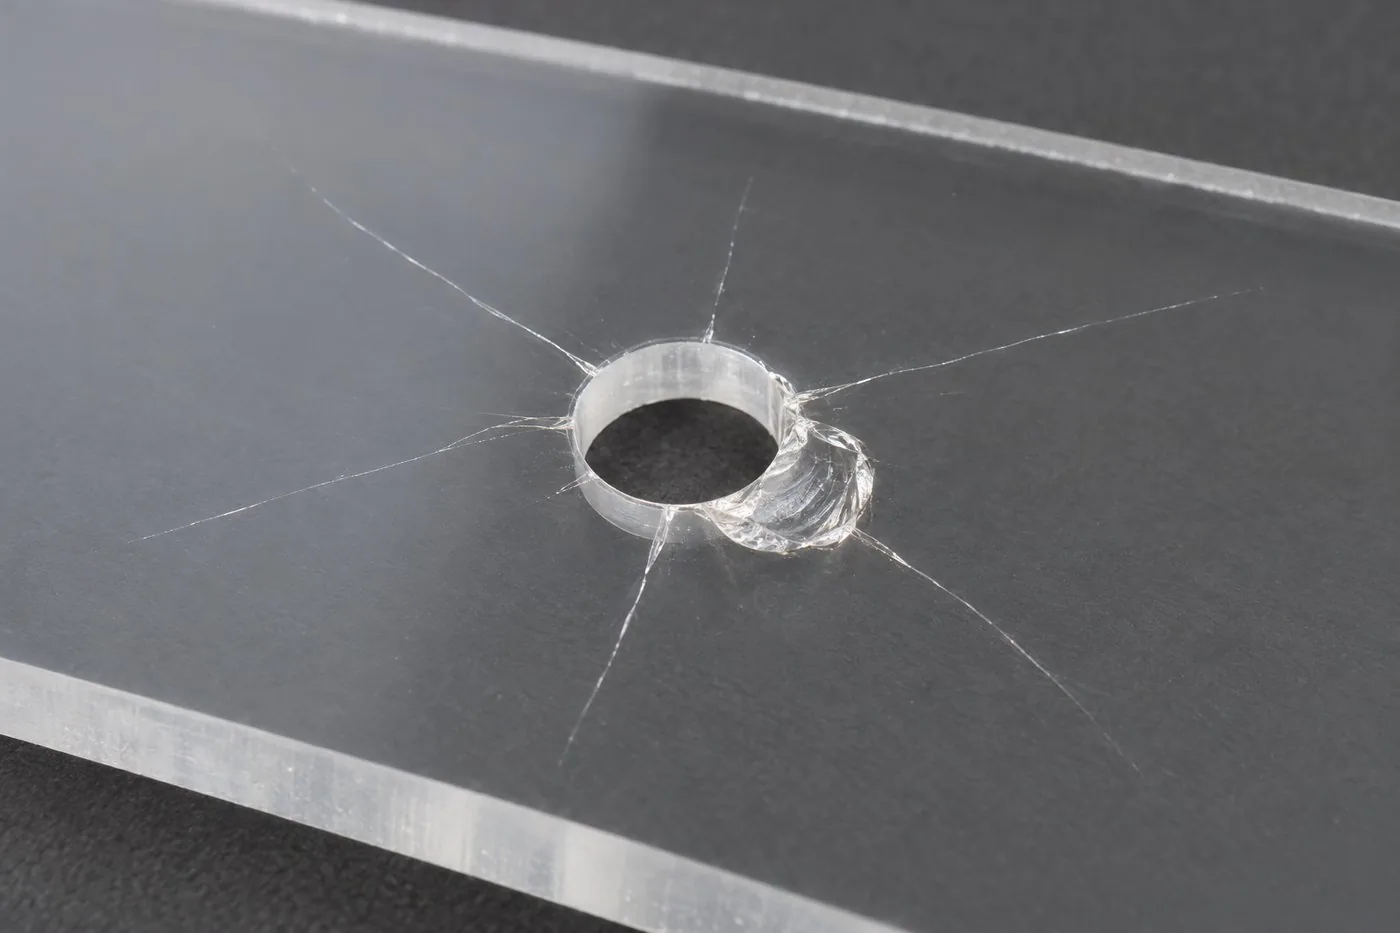
Heat. Chips that pack into the flutes rub against the wall of the hole. The plastic softens, the chips melt, and the bit can weld itself into the hole.
So drilling comes down to the same two things as cutting: keep it cool, and keep the bit from grabbing.
What you need
- Eye protection
- A drill press if you have one, or a hand drill held square to the sheet
- A drill bit ground for plastics, or a standard twist bit reground for plastic (see below)
- A flat scrap backer board
- Clamps
- A countersink bit, if you need flush screws
Which drill bit should you use?
Use one of two bits:
- A bit ground for acrylic and other plastics. Its cutting edge scrapes instead of biting, so it does not pull itself into the sheet.
- A standard twist bit, reground. Sheet manufacturers' guides describe the same three changes: a sharper point (60 to 90 degrees, where a metalworking bit is about 120), a cutting edge ground flat so it scrapes (a rake of 0 to 4 degrees), and more relief behind the cutting edge so less metal rubs the plastic.
A new, sharp, unmodified twist bit is the one most likely to crack the sheet at breakthrough.
How do you drill a hole in acrylic?
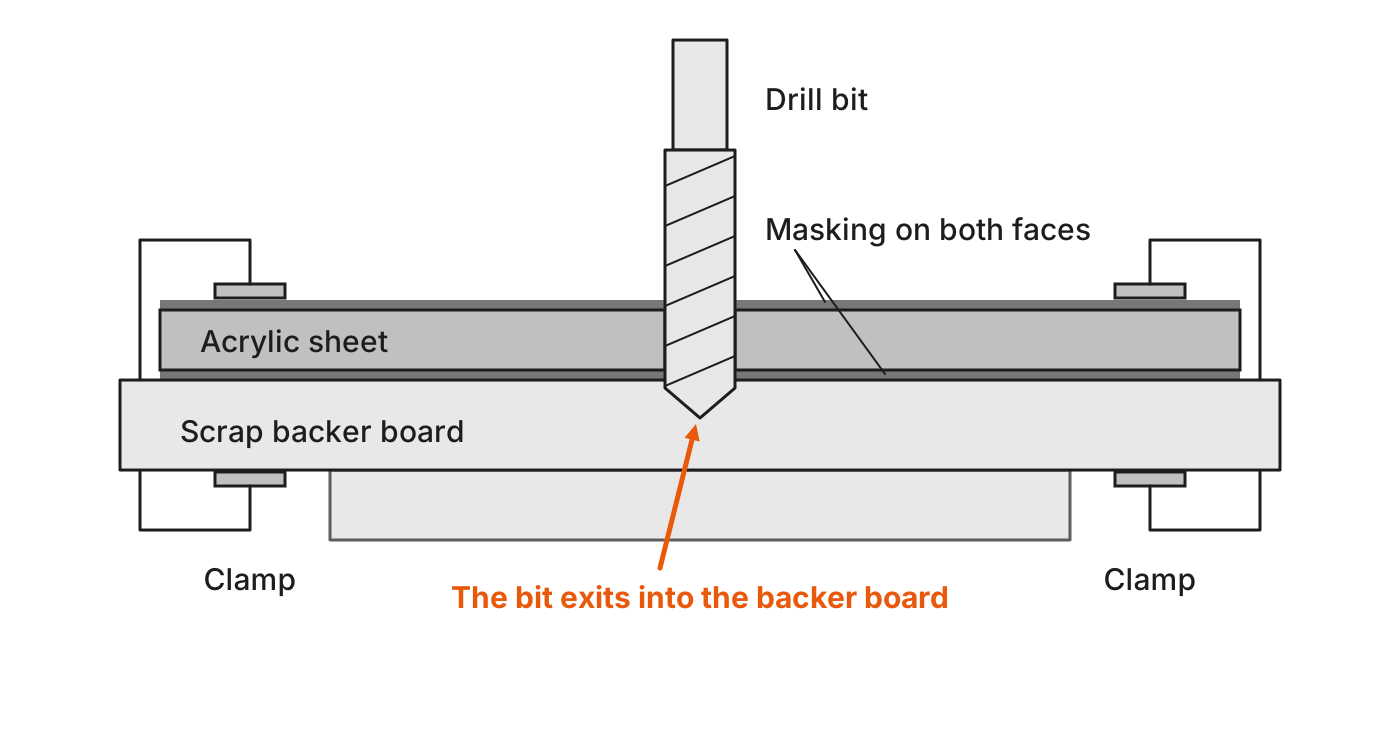
- Leave the masking on. It protects the surface and takes a layout mark.
- Back the sheet. Lay it flat on a scrap board (plywood or MDF), so the bit carries on into solid material as it exits, not into open air.
- Clamp through into the backer. A sheet that is only held by hand can grab and spin on the bit.
- Run a low speed. High speed is heat.
- Use light, steady pressure. Let the bit cut. Do not lean on it.
- Clear the chips. Once the hole is deeper than the bit is wide, back the bit out as you go, so the chips clear and the bit cools. Do not force one continuous plunge. On large or deep holes, a stream of air or a water mist keeps the bit cool.
- Ease off before breakthrough. Lighten the pressure as the bit nears the far face, and let it cut through gently into the backer. Never punch through the last of the material.
Read the chips. Two continuous spiral ribbons coming up the flutes mean the bit and the speed are right. Melted, gummy chips, or chips packed tight in the flutes, mean heat. Slow down, and clear the bit more often.
Where should the holes go?
It depends on what the hole is for.
A hole that is only an opening (to see through, to pass a cable, to let air move) carries no load. It can sit fairly close to an edge. Leave enough material that the rim is not left thin enough to break out when you drill it or handle the piece.
A hole that takes a fastener or carries weight needs more material around it, and room for the sheet to move:
- Keep it back from the edge. As a starting point for a fastener hole, sheet manufacturers' rules of thumb run from one and a half to two hole diameters between the hole and the edge. Polyvantis's Acrylite drilling guide puts the center of the hole at least one and a half diameters in. Plaskolite's sheet guides say two diameters.
- Stay out of corners. A corner has an edge on two sides, so a hole there has the least material around it.
- Drill it oversize, and use a washer. Acrylic moves with temperature and moisture. A tight hole around a screw gives it nowhere to go. Manufacturers' guides all say to oversize mounting holes, and Polyvantis's goes as far as a hole twice the diameter of the bolt where the sheet is held only at its fastening points.
- Do not overtighten. Snug the fastener, and stop.
- Take extra care near a flame-polished edge. Flame polishing leaves stress in the edge, which raises the chance of a crack when you drill close to it.
If a hole has to hold real weight, more material and a thicker sheet are the safe direction. Build one and test it before you commit.
For holes over about 1", and for cutouts, a twist drill is the wrong tool. Those are circle cutter, router, or laser work. See how to cut acrylic sheet.
How do you countersink acrylic?
First decide whether you need to. A countersunk screw wedges into the hole and concentrates stress there. Sheet manufacturers advise against countersunk or flat-head screws for mounting hardware on acrylic, and recommend shoulder bolts or screws with washers in a plain, oversize hole.
Where a flush head is needed and the screw carries little load:
- Use a countersink bit at low speed with light pressure.
- Take it in stages, and check the depth often. It is easy to go too deep, and an over-cut countersink invites a crack.
- Stop as soon as the screw head sits flush, and do not overtighten.
A light touch with a countersink is also a good way to deburr the rim of any hole that will take a screw.
Drilling mirror acrylic
The mirror is a reflective coating on the back of the sheet, under a painted backing. Keep the masking on, back the sheet with plywood so the far face is supported, and use a slow feed as the bit enters and as it exits. A chip in the backing shows in the reflection. If you mount a mirror with screws, drill the holes oversize and do not overtighten: tight screws dimple the sheet and distort the reflection.
Mistakes that crack holes, and the fix
- Using a new, sharp twist bit as it comes. Use a plastics bit, or regrind the cutting edge.
- Drilling into open air. Back the sheet with scrap.
- Holding the sheet by hand. Clamp it.
- Running the drill fast. Low speed, light pressure.
- Pushing through at the end. Ease off before breakthrough.
- Putting a fastener hole close to an edge or in a corner. Move it in.
- Drilling a tight hole for a mounting screw. Drill oversize and use a washer.
- Peeling the masking first. Leave it on until the work is done.
Or have the holes made for you
We cut acrylic to the size you enter, and holes are handled by quote. Send a drawing with the hole sizes and positions, and we will price the piece with the holes in it.
Request a quote for holes, notches, or curves · Shop acrylic cut to size
We ship to the contiguous US. Pieces are made to your dimensions, so check your measurements before you order. The details are on the returns page.
Related guides
FAQ
What is the best drill bit for acrylic?
A bit ground for plastics, with a cutting edge that scrapes instead of biting. A standard twist bit also works if it is reground with a sharper point and a flat, scraping cutting edge. A sharp, unmodified twist bit tends to grab and can crack the sheet as it breaks through.
What speed should you drill acrylic at?
Low. High speed builds heat, which melts the chips and stresses the hole. Use light, steady pressure, and back the bit out to clear chips on thicker sheet.
Why did my acrylic crack when I drilled it?
Usually because the bit grabbed at breakthrough, the sheet had nothing behind it, or the hole was close to an edge. Clamp the sheet to a backer board, use a plastics bit, and ease off the pressure before the bit comes through.
Can you drill acrylic with a regular drill bit?
You can, with more risk. A standard twist bit is made to bite, and in acrylic it can grab and split the sheet. Regrinding the cutting edge flat lowers that risk. A bit made for plastics lowers it further.
How do you countersink acrylic?
With a countersink bit at low speed and light pressure, in stages, checking the depth often. A countersink concentrates stress, so sheet manufacturers advise against countersunk screws for mounting hardware. Where you can, use a plain oversize hole and a washer.
How close to the edge can you drill a hole in acrylic?
It depends on what the hole is for. A hole that is only an opening can sit fairly close to the edge. For a hole that takes a fastener, sheet manufacturers' rules of thumb run from one and a half to two hole diameters back from the edge, and the hole should be oversize, with a washer, and out of the corners.
Sources
Sheet manufacturers' published fabrication guides, used for the bit geometry and hole placement figures above.
- Polyvantis, Drilling ACRYLITE acrylic sheet (fabrication manual). https://www.acrylite.co/resources/fabrication-manuals/drilling-acrylite-acrylic-sheet
- Plaskolite, OPTIX-L Continuous Cast Acrylic Sheet Fabrication Guide (2024). https://plaskolite.com/docs/default-source/fab/fab007_opx_l_sheet.pdf
- Plaskolite, FABBACK Mirror Fabrication Guide (2023). https://plaskolite.com/docs/default-source/fab/fab011_fbk.pdf
- Plaskolite, TUFFAK Polycarbonate Sheet Fabrication Guide (2024). https://plaskolite.com/docs/default-source/fab/fab015_tuf_en.pdf
- Trinseo, PLEXIGLAS Acrylic Sheet Fabrication Manual. Published by Trinseo (trinseo.com).